
Uniform blog/How to run edge personalization with Segment, Vercel, Next.js and practically any headless CMS
How to run edge personalization with Segment, Vercel, Next.js and practically any headless CMS

How to run edge personalization with Segment, Vercel, Next.js and practically any headless CMS
Traditionally, personalization has come at the expense of page speed, which means sacrificing a smooth user experience and SEO results. However, the ability to run personalization at the “edge” (or CDN level) ends that trade-off, giving you fast performance at scale, and exceptional Core Web Vitals. It also means that you don’t need to run and maintain any servers that typically do server-side rendering.
Uniform Context is built with this fast engine, which can be executed on any CDN with a JavaScript runtime and is natively integrated into any modern React or Vue.js-based front-end framework. But, as with any fast “engine”, it needs high-octane fuel (visitor data) to unleash its maximum performance. Visitor data is often required to enable the most compelling personalization use cases, and this is where the pluggable nature of Uniform Context is key. In this guide, we will use one of the best “fuels” on the market - Twilio Segment Profile API, featuring fast response times (under 200ms), and real-time data, among other goodness.
We will pick one of the most popular React meta-frameworks out there - Next.js, and we will run the execution of personalization via Vercel Edge Middleware, which makes it possible to personalize static sites on the CDN level with Uniform edge-side personalization.
We’ll build the page using Uniform Canvas, which allows us to assemble the page visually and pull content from any modern headless CMS, such as Contentful, Contentstack, Strapi, Sanity, etc. but also reuse content from more traditional CMSes, commerce engines, DAM, etc.
Prerequisites
- Twilio Segment and Twilio Engage with access to Profile API
- An account with Uniform, if you don’t have access, you can request a trial here.
- Next.js app instrumented with Uniform SDK. Check out our Getting Started section.
- An account with Vercel.
Step 1: Configure personalization in Uniform Context
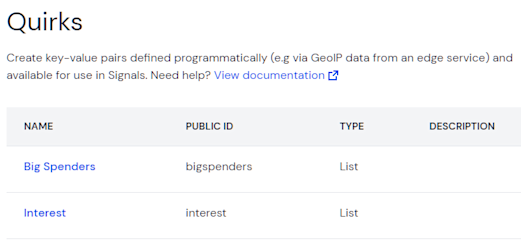
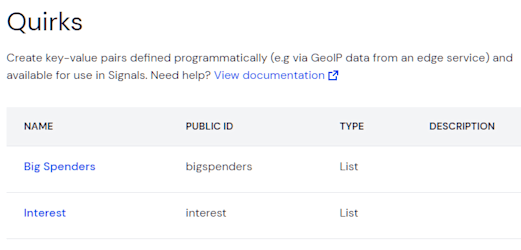
Uniform Context’s personalization engine is based on signals and intents. A signal could be resolved from any criteria - cookie, query string, geo-location, as well as using data from a visitor profile. The visitor profile data is defined as quirks in Uniform, so that’s the first step, let’s create a quirk “Big Spenders” and “Interest”. These quirks will be mapped to the traits coming from Segment Profile API:
Next, let’s create a signal “Big Spenders” that will use the newly created quirk as criteria:
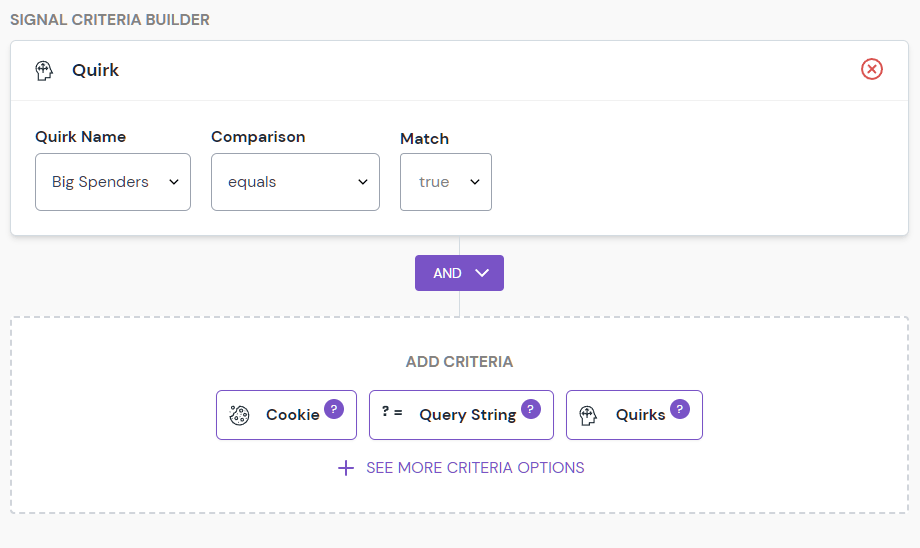
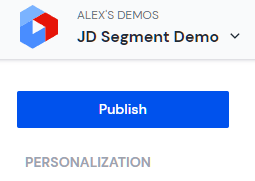
Repeat this step for any quirk that you created and Publish this configuration.
Step 2: Compose your personalized experience visually with Uniform Canvas
After the required configuration for personalization (signals) is in place, you can activate personalization on any component in Uniform Canvas and do it visually. Simply click “Personalize This” on any component, specify the personalization criteria (”Big Spender” signal in our case) and author the content using convenient in-line editing.
The content for the personalized component can be sourced from any CMS, Commerce, Search or DAM—all connected in clicks rather than code in Uniform Mesh.
Step 3: Instrument your Next.js app with Segment
This step has nothing to do with Uniform, it is required for your front-end to be able to send visitor data to Segment.
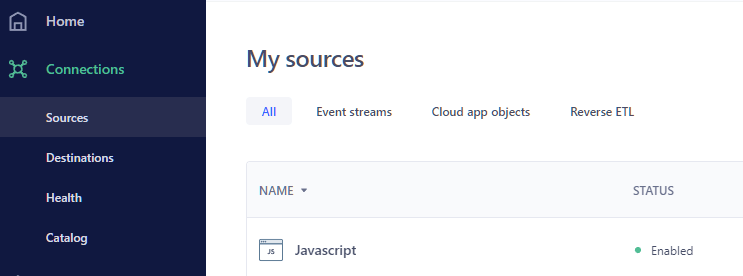
- Make sure you have a JavaScript source enabled in your Segment workspace:
- Grab your Write Key for this source, we will be using it later. More on this
here. - Run
npm install segment/snippetto your app. - If you are using TypeScript, run
npm i types/segment-analytics --save-dev
to get the the typings for Segment Analytics. - Add Segment snippet into your
/pages/_app.tsxusingnext/script:1import Script from 'next/script'; 2import * as snippet from '@segment/snippet'; 3... 4function renderSnippet() { 5 const opts = { 6 apiKey: process.env.NEXT_PUBLIC_ANALYTICS_WRITE_KEY, 7 page: true, 8 }; 9 return process.env.NODE_ENV === 'development' ? snippet.max(opts) : snippet.min(opts); 10} 11 12function MyApp(...) => { 13... 14return ( 15 <> 16 <Script id="segment-script" dangerouslySetInnerHTML={{ __html: renderSnippet() }} /> 17undefinedundefinedundefined... 18undefinedundefined</> 19undefined); 20} - If you would like to track client-side routing events as page visits in Segment, you would need to add next/router event subscribers:
1import { useRouter } from 'next/router'; 2... 3// add this to the App render function: 4const router = useRouter(); 5 useEffect(() => { 6 const handleRouteChange = (url: string) => { 7 global?.analytics?.page({ 8 path: url, 9 referrer: window.location.origin, 10 url: window.location.origin + url 11 }); 12 }; 13 router.events.on('routeChangeComplete', handleRouteChange); 14 return () => { 15 router.events.off('routeChangeComplete', handleRouteChange); 16 }; 17 }, [router]); - Set
NEXT_PUBLIC_ANALYTICS_WRITE_KEYenvironment variable in your .env file that has the write key from the step earlier.
Step 4: activating Segment Profile API with Next.js
We would need the ability to fetch visitor traits from Segment Profile API in order to hydrate Uniform Tracker with this data. We don’t want to communicate with Segment Profile API directly from the browser, so we need a tiny proxy and thankfully Next.js has a handy API Routes facility we can use.
- Install Axios library for data fetching with
npm install axiosthis is needed since standardfetchhas trouble parsing the response from Profile API. - Create a
traits.tsfile under/pages/apiwith the following contents:This function retrieves the current segment anonymous id from cookies and passes it to Profile API along with basic authorization credentials.1import type { NextApiRequest, NextApiResponse } from 'next'; 2import axios from 'axios'; 3 4export default async function handler(req: NextApiRequest, res: NextApiResponse) { 5 const segmentSpaceId = process.env.SEGMENT_SPACE_ID!; 6 const segmentApiKey = process.env.SEGMENT_API_KEY!; 7 const nextCookies = req.cookies; 8 const ajs_anonymous_id = nextCookies.ajs_anonymous_id; 9 const url = `https://profiles.segment.com/v1/spaces/{segmentSpaceId}/collections/users/profiles/anonymous_id:{ajs_anonymous_id}/traits`; 10 const basicAuth = Buffer.from(segmentApiKey + ':').toString('base64'); 11 axios 12 .get(url, { 13 headers: { 14 Authorization: `Basic {basicAuth}` 15 }, 16 }) 17 .then(response => { 18 res.status(200).json(response.data); 19 }) 20 .catch(function (error) { 21 res.status(error.response.status).json({ 22 error, 23 }); 24 }); 25} - Retrieve Segment space ID and access token according to the official docs here and add those as Segment environment variables to your .env file:
1SEGMENT_SPACE_ID= SEGMENT_API_KEY=
Step 5: integrating Segment with Uniform Tracker
The last step is to add one-time instrumentation to your app that will fetch the traits using our newly created
/api/traits endpoint during the previous step and set the value of traits as Uniform Quirks.First, create the following React component anywhere in your codebase:
1import { useEffect } from 'react';
2import { useUniformContext } from '@uniformdev/context-react';
3
4const TrackerScoreSync = () => {
5  const { context } = useUniformContext();
6  useEffect(() => {
7    const fetchTraits = async () => {
8      const response = await fetch('/api/traits');
9      const { traits } = await response.json();
10      await context.update({
11        quirks: {
12          ...traits,
13        },
14      });
15    };
16    fetchTraits();
17  }, [context]);
18  return null;
19};
20
21export default TrackerScoreSync;
Then add the
<TrackerScoreSync /> component into any application container render function, for example, to _app.tsx. That’s it, now Uniform tracker will get the latest traits from Segment’s Profile API, and personalization configured during the earlier step will kick in automatically.Step 6: activate edge personalization mode
Uniform Context can run personalization anywhere you render - during server-side rendering, and client-side rendering (hydration), but there is also a special way to run it at the CDN level, we call it “edge-side” personalization. This mode allows visitors will experience no flicker personalization with the performance and scalability of static sites. This mode is available on any CDN that supports programmable edge runtime. We will be using Vercel Edge Middleware for this walkthrough. The steps requires to do one-time activation are described here.
Let’s see it in action
Next steps
We are only scratching the surface of possibilities here. In addition to retrieving Segment Profile data (traits), you can also send data from the Uniform tracker to Segment, which will contain intent and behavioral data based on the content being consumed in real-time. Any personalization at scales requires content, a ton of content. Uniform Mesh allows you to source that content from any source, either using our integration with 15+ headless CMS, commerce engines, or any REST API. You can also integrate with generative AI to help scale content production, but that’s a topic for another post.
If you want to see how Uniform can help your use cases, request a demo here.
.png&w=1080&q=90)
.png&w=1080&q=90)
.png&w=1080&q=90)